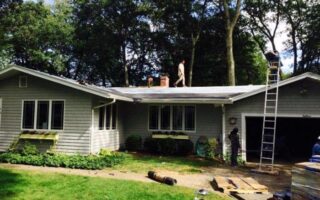
Installing a new roof is a significant investment for any homeowner. Whether you’re replacing an old roof or building a new home, understanding the roof installation process can help you make informed decisions and make sure the job is done right.
In this guide, we’ll walk you through each step of the process, from preparation to final inspection. By the end, you’ll have a clear picture of what to expect when installing a new roof.
The Importance of Proper Roof Installation
A well-installed roof is crucial for protecting your home from the elements. It provides insulation, prevents leaks, and enhances curb appeal. When considering a roof installation, knowing the steps involved can give you confidence in the project and help you communicate effectively with your contractor.
Step 1: Planning and Preparation
The first step in any roof installation project is thorough planning and preparation. This involves:
- Choosing the Right Materials: There are various roofing materials available, including asphalt shingles, metal, tile, and wood. Each material has its advantages and disadvantages, so it’s essential to choose one that fits your budget, climate, and aesthetic preferences.
- Obtaining Permits: Before installing, check with your local building department to see if you need any permits. This ensures the project complies with local codes and regulations.
- Preparing the Site: Clear the area around your home to provide easy access for the roofing crew. This might involve moving outdoor furniture, trimming trees, and protecting landscaping.
Step 2: Removing the Old Roof
If you’re replacing an existing roof, the next step is to remove the old materials. This process includes:
- Tearing Off the Old Roof: The roofing crew will remove the old shingles, underlayment, and any damaged decking. This step is crucial for inspecting the underlying structure and making sure a solid foundation for the new roof.
- Inspecting the Decking: Once the old roof is removed, the decking (the wooden base of the roof) is inspected for any damage or rot. Any compromised areas are repaired or replaced to provide a stable surface for the new roof installation.
Step 3: Installing the Underlayment
The underlayment is a protective layer that sits between the decking and the shingles. It serves as a moisture barrier and adds an extra layer of protection. The installation process includes:
- Laying the Underlayment: The crew will roll out and secure the underlayment, ensuring it covers the entire roof. This step helps prevent water infiltration and protects the decking from damage.
- Adding Ice and Water Shield: In areas prone to ice dams or heavy rainfall, an additional ice and water shield is applied to the edges and valleys of the roof for extra protection.
Step 4: Installing the Shingles
With the underlayment in place, it’s time to install the shingles. This is the most visible part of the roof installation process and includes:
- Laying the Shingles: Starting from the bottom edge of the roof, the crew will lay the shingles in overlapping rows. This ensures proper water runoff and a uniform appearance.
- Nailing the Shingles: Each shingle is nailed securely in place, following a specific pattern to maximize durability and wind resistance. The type and number of nails used depend on the roofing material and local building codes.
- Sealing the Shingles: Once the shingles are in place, the crew will seal the edges and any protrusions (such as vents and chimneys) with roofing cement or caulk. This prevents water from seeping underneath the shingles.
Step 5: Installing Flashing and Ventilation
Flashing and ventilation are critical components of a well-functioning roof. This step includes:
- Installing Flashing: Flashing is placed around chimneys, vents, and other roof penetrations to prevent water leaks. It’s typically made of metal and is installed in overlapping layers for maximum protection.
- Adding Ventilation: Proper ventilation helps regulate temperature and moisture levels in your attic, extending the life of your roof. This involves installing ridge vents, soffit vents, or other ventilation systems as needed.
Step 6: Final Inspection and Cleanup
The final step in the roof installation process is a thorough inspection and cleanup. This makes sure the roof is properly installed and ready to protect your home. The process includes:
- Inspecting the Roof: The roofing crew will inspect the entire roof to ensure all materials are installed correctly and there are no missed spots or potential issues. Any necessary adjustments are made at this stage.
- Cleaning Up the Site: After the inspection, the crew will clean up the work area, removing any debris, nails, and old roofing materials. This leaves your property looking neat and tidy.
Conclusion
Understanding the roof installation process can help you feel more confident and prepared when undertaking this significant home improvement project. Each step is crucial for ensuring a durable and effective roof, from planning and preparation to final inspection and cleanup. Regular maintenance and timely repairs can also extend the life of your new roof.
At The Boston Roofers, we specialize in professional roof installation and repairs. Our experienced team is dedicated to providing high-quality service and making sure your home is protected. If you’re considering a new roof or need repairs, contact us today for a free consultation. Visit our website or call us to learn more about our services and how we can help with your roofing needs.


